
I know you're out there...people like me who are addicted to making jewelry but get frustrated with the process, have trouble focusing on a design (so many beads!), or can't seem to carve out the time from your life. This blog is for us. Let's share experiences.
Thursday, September 3, 2009
A Few More Examples of My Work: New and Old

Friday, August 7, 2009
My First Tutorial: Pinched Ball Earrings

These earrings are enjoyable to make and lend themselves to a variety of designs. And, since this is my first tutorial, I'm counting on you guys to give me some constructive feedback.
Important Note: This tutorial is written for those with experience in the use of a torch and the knowledge of the safety measures that come with using it.
Materials:
- 16 gauge round, fine silver wire
- 20 gauge round, fine silver wire for the earwires, or you can use ready-made ones from your jewelry supply shop
- 9/8 inch diameter hardwood dowel
- Good quality flush cutter
- Torch (I use the butane microtorch...also used for creme brulee)
- Soldering block
- Wooden block with a 1/4 inch mandrel fixed into it (you can use a 1/4-inch screw and saw off the top like I did)
- 1 narrow-diameter nail, approx. 2mm
- Jeweler's hammer
- Steel block
- Tumbler with steel shot and original Dawn dish liquid
- Wind the 16g wire around the 9/8-inch dowel twice to make 2 rings. Slide the coil off . Cut two rings with a flush cutter.
- Now look at the opposing ends on each ring you just cut. One end is flat across, the other is in a wedge or pointy shape. You need to cut this pointy shape so it is also flat across. Use the flat side of the flush cutter to cut this end flat, or flush (you don't need to cut in too much).
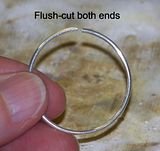
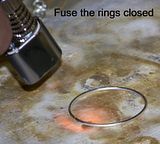
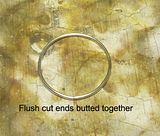 Butt these ends together to form the ring. Make sure there aren't any gaps. Place carefully on the soldering block (take your time with this) and fuse this joint closed. Let the ring cool on its own. Side Note: If you're not sure how to fuse, I highly recommend an online course by Iris Sandkuhler of Sandkuhler Studio called "Fused Loop Pendants and Stackable Rings". That's how I learned, and I've been having a blast with fusing ever since.
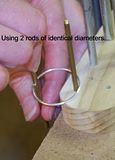
- With two thin, metal rods of the same diameter, stretch the ring into an oval shape.
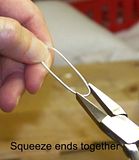
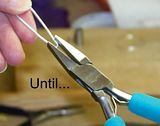
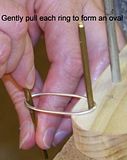 Squeeze one end of the oval together with flat-nosed pliers until the sides touch each other. Squeeze the other end together, but just before the sides touch each other. This will be the end that hangs from the earwire.

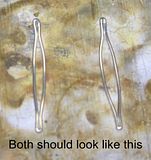 Use the torch to form a ball at the end where the sides are touching each other. It's best to do this with the earrings next to each other so you can try to make the balls approximately the same size. Let them cool on their own.
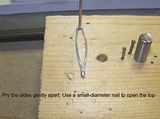
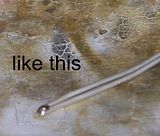 Gently pry the sides apart and fit the open shape over the 1/4-inch mandrel. Pound the narrow-diameter nail through the earwire end. Just in front of the nail, squeeze the wire together to shape the hole for the earwire. Gently pull out the nail, and pull the earring off of the mandrel.

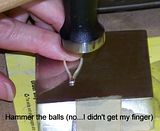
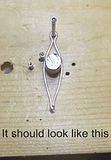 Hammer the balls on both sides against the steel block until they are to your liking. This step really shines them up.
  Add the earwires.
- Place the earrings in a tumbler with some steel shot, water just 1/2 inch above the shot, and a squirt of the original Dawn dishwashing liquid. Tumble for as long as you want. I tumbled mine for around 6 hours total, and they were nice and hard.
- Alternate Finish: If you prefer, or if you don't own a tumbler, you can hammer the entire earring to harden it. This will give it a lot of shine and flash.
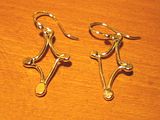
Sunday, July 26, 2009
What is Your Jewelry-Making Music?
Walking on the rail trail today I got to thinking (danger!) how some tunes on my Ipod are perfect for walking, some for a slow jog, and some for an all-out sprint. Then my thoughts turned to my studio and I tried to get an idea of the perfect tune mix for the jewelry making tasks waiting for me there. Note to self...good luck with that. My musical tastes are all over the map.
I'll just stick to my favorite playlist and try to exercise some self-control...let's see.
- Ray of Light, by Madonna
- Crazy, by Knarls Barkley
- Adouma, by Santana (with Seal on vocals)
- Working Class Hero, by John Lennon...performed by Green Day
- The Likes of You Again, by Flogging Molly (or anything by Flogging Molly)
- Sound of a Gun, by Audioslave (or anything by the short-lived group)
- Business Time, by Flight of the Conchords
- Bittersweet Symphany, by Verve Pipe
- Clocks, by Cold Play
- I Will Possess Your Heart, by Death Cab for Cutie
- Tranquilize, by The Killers (with Lou Reed...remember him?)
Let me know what your favorite jewelry-making tunes are...I might be missing some great music in my studio!
Thursday, July 23, 2009
Tuesday, July 21, 2009
What Really Goes Into a Handmade Piece of Jewelry?
I began to realize that I, and any one of you reading this blog (or not reading it), is a true artist in your own right. I don't care if you're forging silver and gold with expensive tools, stringing beads onto a simple leather cord, or firing a lampwork bead...what you're doing is a necessary artistic expression of what was in your soul. And I say necessary because you feel like you'll climb the walls if you don't express yourself...it's almost like eating or drinking. Then you made a beautiful piece of wearable art and you stood back and you just can't stop admiring it because it came from your head and your heart.
Then, you give it to a loved one as a gift and try to act modest when everyone is Oohing and Aahing over it (I know, it's hard) and you hope they appreciate that you put your heart and soul into it and maybe got a few cuts and scratches along the way. We do suffer for our art.
And if they don't, it doesn't matter...you know, and all your fellow jewelry artists know. And you had a good time making it.
What is it "They" say (yes, the ubiquitous "they")? It's not the destination...it's the journey.
Saturday, July 18, 2009
For the Love of the Art
But I’m damn good at it. I use what I’ve got: tools and beads collected through the last two decades. And let’s not forget those free tools: imagination and “no fear”. And I use “no fear” as a mantra when I’m about to either 1) severely wreck or 2) delightfully enhance a piece of silver.
I love the jewelry arts, and, as most of you do, find it hypnotically addicting. There are worse drugs to be hooked on. Although with jewelry making, I don’t have to steal from my son’s college account to feed my habit.
I’m suspecting there are more of you like me…jewelry making is your pastime. You have to work full time to have health insurance (if it’s offered) and to pay for stuff like food, clothing, shelter, kid’s (or your own) education, and let’s not forget fun stuff. But you still have that overwhelming desire to hammer the metal, string the beads, burn the silver, and get that awesome sense of pride when you or someone else wears your masterpiece. And that’s when everyone wishes they could do this for a living. Yeah, me too.
Let’s share our learning experiences from our collective jewelry-making history. You never know what you can learn from a half-assed jewelry artist. Or what she can learn from you…new ideas, mistakes that turned into something cool, weird techniques, new products and tools to die for.
I’ll start…below is a photo of a pair of earrings I made by cutting silver sheet with metal shears. Yeah, yeah, I know…I already got beat up about it by a couple of people on the Art Jewelry Forum, but I’m over it. I wanted a cool texture on them, so I found a cinder block in the backyard and pounded the concrete texture into them with a plastic mallet (both sides). By that time they were very hard, so I torched and domed them in a wooden dapping block. I added the ear wires and tumbled them for a couple of hours, added the lime jade beads, and now wear them with everything.


